Why Garages Become Catch-All Spaces
The garage is usually the last room anyone thinks about and the first one that fills up. Because it sits outside the main living area, it absorbs overflow from every other room — sports equipment from spring, holiday decorations from winter, tools that never found a permanent home. The result is a space that feels so far gone that starting feels impossible.
The good news: garages respond well to organization because they typically have more square footage and more wall surface than any interior room. If you are newer to decluttering in general, the beginner-friendly principles in our starting-fresh guide can help you build the right mindset before you pull out the first bin. For a broader room-by-room approach, the complete home organization walkthrough puts the garage in context with the rest of your home.
What You'll Need Before You Start
Gathering your tools before you begin prevents mid-project trips to the store that stall momentum.
What you will need
Sturdy shelving units
Provide organized, stackable storage along walls for bins and equipment.
Heavy-duty storage bins with lids
Keep category-sorted items contained, stackable, and protected from dust.
Pegboard or slotted wall panel
Mount hand tools and small accessories on the wall to free up shelf space.
Overhead ceiling storage rack
Store bulky seasonal items like holiday décor or camping gear above head height.
Stud finder
Locate wall studs to safely anchor shelving and heavy hooks.
Permanent marker and labels or label maker
Mark every bin and shelf zone so items are easy to find and return.
Utility hooks and wall anchors
Hang long-handled tools, bikes, and hoses to maximize floor space.
Step-by-Step: From Chaos to Functional
Follow these steps in order. Skipping ahead — especially buying storage before sorting — is the single most common reason garage projects fail.
Clear Everything Out
Pull every item out of the garage and place it on the driveway or lawn. This step feels drastic, but it is the only way to see what you actually have and to work with a clean slate. Do not skip partial areas — hidden corners are where forgotten duplicates and broken items live.
Sort Into Categories
Group everything by type: automotive, lawn and garden, sports and recreation, hand tools and power tools, seasonal décor, camping, hardware, and items that belong inside the house. Create a discard pile for anything broken, expired, or duplicated. A donate pile handles usable items your household no longer needs.
Be honest about each item. A useful rule: if you would not bother replacing it if it disappeared tomorrow, it can leave.
Dispose of Discards Responsibly
Remove the discard and donate piles before moving anything back in. Hazardous materials — old paint, motor oil, batteries, and pesticides — require proper disposal through your municipality's hazardous waste program. Check your local government's website for drop-off dates and accepted materials. Do not pour chemicals down drains or into trash bins.
Plan Your Activity Zones
Before moving anything back in, sketch a simple floor plan of your garage on paper. Assign each category a zone based on how often it is used and where it is most convenient. Frequently used items — everyday tools, sports gear, recycling bins — belong near the door. Seasonal or rarely used items can go deeper into the space or up high.
Common zones include: a workbench area, a lawn and garden wall, a sports equipment bay, an overhead seasonal storage area, and a general hardware shelf. Match the zones to your household's real habits, not an ideal version of them.
Maximize Vertical Space
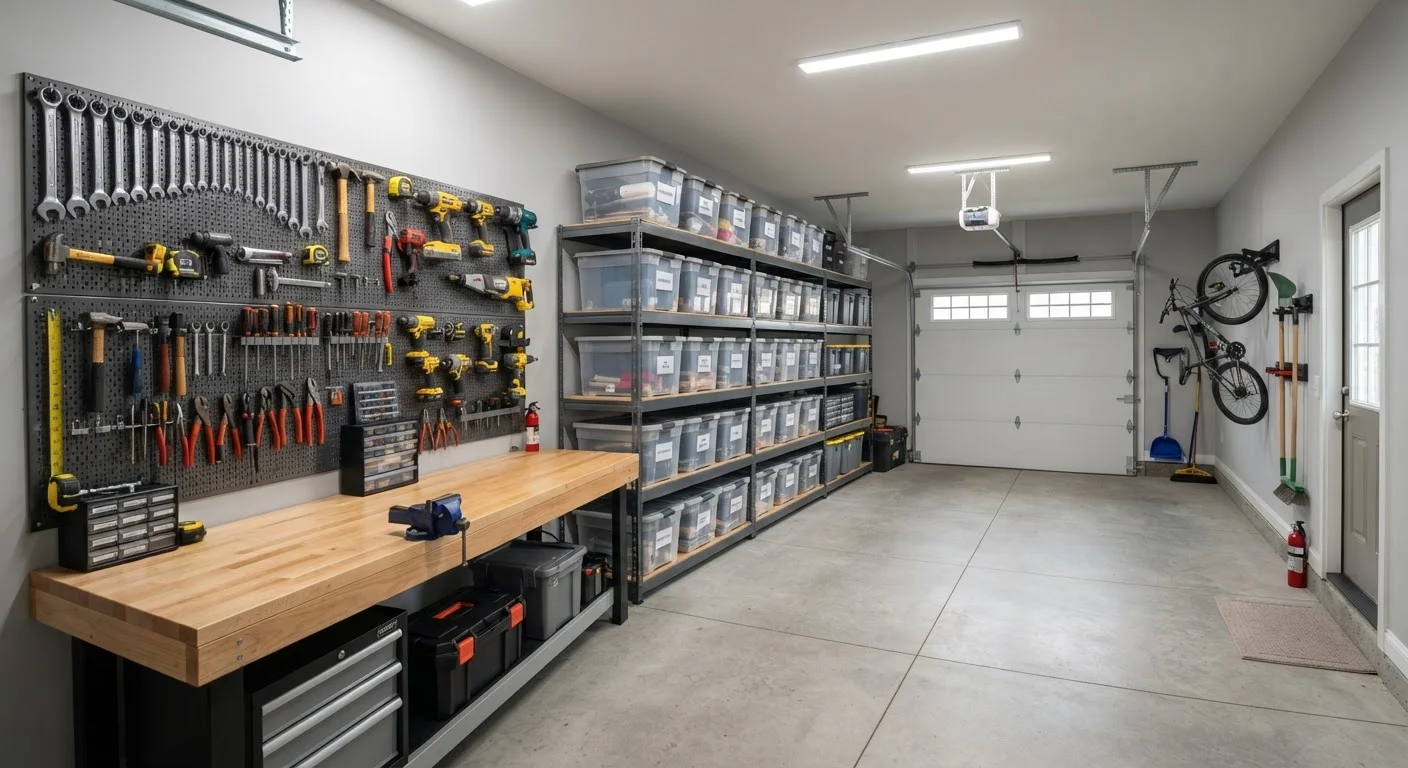
Walls and ceiling are the most underused real estate in a garage. Install sturdy wall shelving for bins, pegboards or slotted wall panels for hand tools, and overhead ceiling racks for bulky seasonal items like camping gear or holiday boxes. Keep heavy items low and light items high.
Freestanding shelving units work well along back walls. Hooks mounted to studs handle long-handled tools like rakes and shovels without taking up floor space.
Bin, Label, and Return Everything
Place category-sorted items into appropriate containers — clear bins let you see contents at a glance without opening each one. Label every bin, shelf section, and hook location. Labels do not need to be fancy; a permanent marker on masking tape works. The goal is that any household member can find and return an item without guessing.
Return items to their assigned zones, keeping pathways clear and leaving buffer space in each zone for new items in that category.
Hazardous Materials Need Proper Disposal
Old paint, motor oil, fertilizers, and pesticides cannot go in regular household trash. Improper disposal can create environmental hazards and may violate local regulations. Contact your city or county to find a household hazardous waste drop-off event or facility near you before your project day.
Keeping the System Working
An organized garage will drift back toward chaos without a light maintenance habit. Once a month, spend ten minutes walking the perimeter: return anything that has landed outside its zone, consolidate half-empty bins, and check whether any zone needs to be reconfigured for the season. Seasonal swaps — trading lawn equipment for snow gear, for example — are easier when each category already has a defined home.
If you find certain zones consistently break down, that is a signal the system does not match how your household actually uses the space. Adjust the zones rather than fighting the behavior. For a deeper look at why organized spaces slip back into disorder, see where organization efforts tend to break down. If you are working with limited square footage, the strategies in small-space renovation approaches can help you squeeze more utility from every corner.
Seasonal Rotation Saves Space Year-Round
Designate one overhead or back-wall zone specifically for off-season items. When summer ends, lawn equipment moves to deep storage and winter gear moves forward. This rotation keeps your most-used items accessible without requiring more total storage space.